Affiliate Disclosure: This post contains affiliate links. If you click a link and make a purchase on Amazon, Sugar and Science may earn a small commission at no extra cost to you. Our opinions come from our own kitchen experience, and we only recommend products we would genuinely use.
Somewhere around the third week of any school year, the lunchbox routine starts to wobble. The sandwich that felt like a win on Monday comes home half-eaten by Thursday, crusts abandoned, filling squished out one side. That is usually the moment the sealed, crustless pockets in the freezer aisle start looking very tempting, right up until you check the price per sandwich and the ingredient list.
That little kitchen dilemma is what sent me looking at the Uncrustable Sandwich Maker from CHICHAUS: a small, hand-operated cutter and sealer that turns ordinary sliced bread into round, crimped pockets. I have been using it for a few weeks now, and this review covers what it does well, where it gets fussy, and whether the numbers make sense for a busy household.

Why I Reached for an Uncrustable Sandwich Maker in the First Place
The Problem With Store-Bought Pockets
I have nothing against the frozen version. It is convenient, kids like it, and it travels well. But the convenience comes with trade-offs I kept noticing: you get whatever fillings the manufacturer picked, the sandwiches are a fixed size, and the cost adds up quickly when lunches are a daily thing. The listing for this maker leans on the same argument, pointing out that homemade pockets let you skip some of the preservatives and additives found in prepared foods, and it puts the savings at roughly 40 to 50 cents per sandwich.
I treat that number as a claim rather than a promise, since it depends on which bread and fillings you buy. Still, the underlying idea appealed to me. If I control the bread and the filling, I control what goes into the lunchbox.
What Caught My Attention on the Listing
Before buying, I did what most of us do: I looked at how other people rated it. When I checked the page, it carried a 4.5-star average from 2,430 ratings, held the #1 Best Seller badge in Sandwich Makers & Panini Presses, and showed "9K+ bought in past month." Popularity alone is never a reason to buy something, but it told me the design was not an obscure experiment. Thousands of people had already tried it in real kitchens.
How the Sandwich Maker Works in a Real Kitchen
The Two-Step Routine
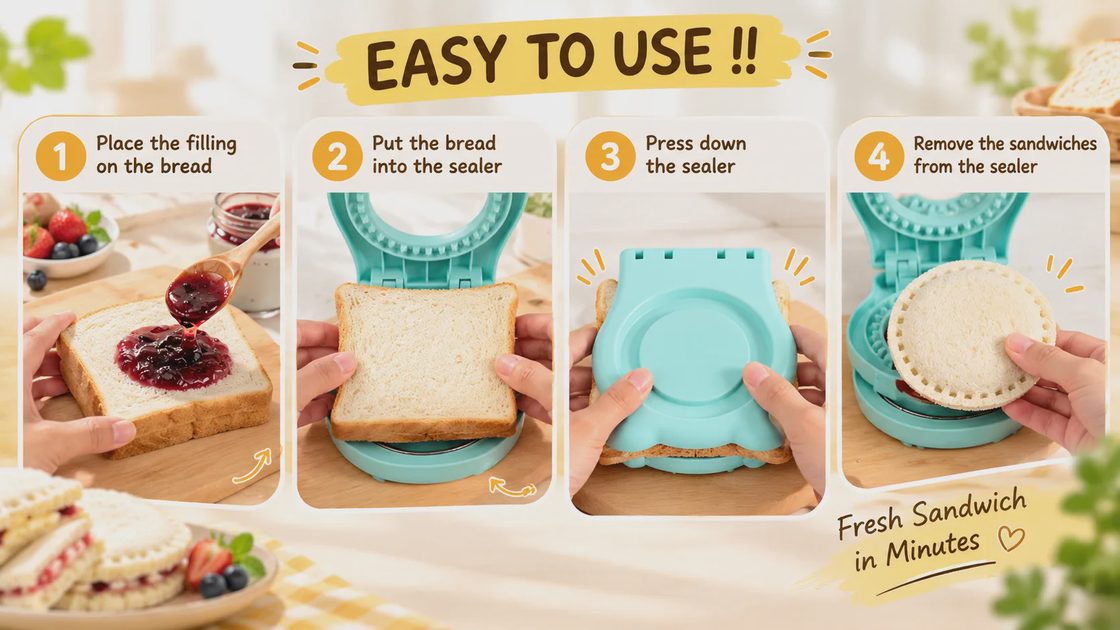
The process is refreshingly simple, and it is the main reason this gadget earned a spot on my counter instead of in a drawer. Here is how a typical sandwich goes:
Lay a slice of bread on the base and add your filling in the center.
Top it with the second slice, fold the handle down, and press firmly.
That single press does two jobs at once. The stainless steel ring cuts the shape while the raised, tooth-like pattern around the edge presses the two slices together into a sealed pocket. After a lift and a gentle tap, you pull away the leftover crust in one frame-like piece, and the round sandwich stays behind.
The comfort handle helps more than I expected. You are pressing through two layers of bread, and a handle that sits well in your palm makes it feel controlled rather than clumsy.
Getting the Bread Right
This is the part that deserves the most attention, because bread choice makes or breaks the result. According to the listing, the sealer is designed for square or round bread that is at least 4.5 by 4.5 inches. In my kitchen, standard soft sandwich bread worked best. Thin, fluffy slices cut cleanly and seal nicely, while very dense or crusty artisan loaves resisted the press.
A few things I noticed while testing different loaves:
Fresh, soft bread seals better than bread that has started to dry out.
Slightly chilled bread is easier to handle if you are working with sticky fillings.
Slices that are smaller than the recommended size leave you with a ragged, incomplete cut.
Filling Tips That Saved Me Some Mess
My first two sandwiches were a lesson in restraint. I piled on the filling, pressed down, and watched it ooze out of the seam. The listing warns about this directly: too much filling and the pocket will be packed too tightly and may spill or tear. Here is what I do now:
Keep the filling centered and leave a clear border of bread all the way around.
Spread thick fillings such as nut butter in a thin, even layer.
Build a small "wall" of nut butter around softer fillings like jam, so the sweet middle stays put.
Chop deli meats and vegetables into flat, thin pieces instead of stacking them high.
Once I followed those habits, the seal held reliably, even after a few hours in a lunch bag.

Putting It to Work: Fillings and Lunchbox Ideas
Sweet Pockets for Snack Time
The classic pairing is nut butter and fruit spread, and it works beautifully here because the sealed edge keeps the jam from wandering. I also tried cream cheese with thinly sliced strawberries and a banana-and-honey version. Each one felt like a small, neat treat rather than a sloppy sandwich.
Savory Pockets for Real Lunches
For lunches, my favorites were turkey with cheese, egg salad kept on the thick side, and a simple ham-and-mustard combination. Because the sandwich is compact and sealed, it fits neatly into a lunchbox compartment without leaking into everything around it. I liked that a pocket eaten with one hand does not fall apart halfway through.
Letting Kids Take the Lead
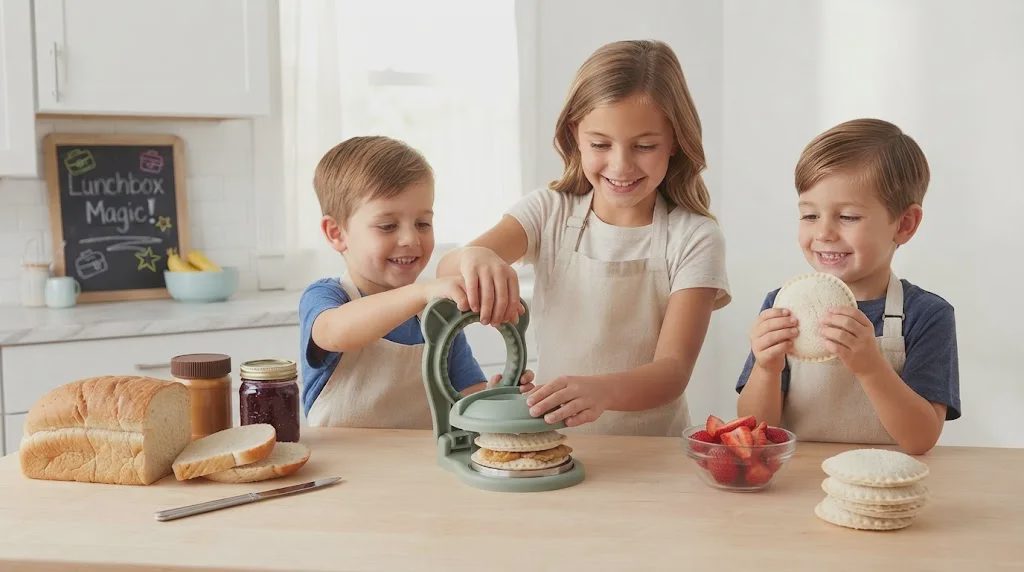
The listing highlights how easy the tool is for children, and I can see why. The steps are short and visual: bread, filling, press. It is a good way to get kids interested in what goes into their own lunch, and it turns assembly into a small hands-on project. I would still keep an eye on younger children, since the cutting edge is sharp enough to slice through bread cleanly.

Does the Math Actually Work Out?
The Savings Argument
When I ordered, the Light Blue version was priced at $7.98. That is about what a single specialty sandwich or a small box of frozen pockets might cost, depending on where you shop. If you take the listing's own estimate of 40 to 50 cents saved per sandwich, the gadget could pay for itself after somewhere between 16 and 20 sandwiches. For a family packing several lunches a week, that is a reasonable timeline, though your real numbers will depend on your bread and fillings.
From Cart to Countertop
Buying it turned out to be uneventful, which is exactly what I want from a kitchen tool. The listing shows it as sold by the CHICHAUS Store and shipped by Amazon, so it goes through Amazon's normal fulfillment and returns process rather than a third-party warehouse. There is also a free 30-day refund or replacement window, which made the low price feel even safer: if the tool did not suit my bread or my routine, sending it back would not have been a hassle. You can find it on the Amazon product page here.
Cleaning Up
Cleanup is where a gadget either earns its counter space or gets abandoned. The stainless steel cutting ring lifts out of the base, which means you can rinse it thoroughly instead of scrubbing around a fixed edge. The listing also notes that the ring is easy to clean and dishwasher-friendly. I still hand-rinse the plastic base right away, since bread and sticky fillings are much easier to wipe off before they dry.

A Few Honest Trade-Offs
Where It Asks for a Little Patience
No tool is perfect, and this one has a short list of quirks worth knowing before you buy:
Bread size matters. Small or narrow slices, including some gluten-free and specialty breads, may not fit the recommended dimensions.
It is a single shape. You get one round pocket, so if you want squares, triangles, or novelty shapes, this is not that tool.
The seal is pressed, not factory-crimped. It holds well when you fill sensibly, but it is not a substitute for a machine-made seal if you overstuff.
Leftover crusts add up. I turn mine into breadcrumbs or croutons, but if you dislike food scraps, keep that in mind.
None of these were dealbreakers for me, and most disappear once you learn the bread and filling that suit your household.
Final Thoughts
After a few weeks, the Uncrustable Sandwich Maker has settled into the category of small tools I actually reach for. It is simple, quick, and forgiving once you respect the bread size and keep the filling under control. It will not replace every sandwich, but for lunchboxes, after-school snacks, and weekend picnics, it makes homemade pockets feel effortless and a little bit fun.
If you have been on the fence about making your own sealed sandwiches, this is a low-risk place to start. You can check the current details and pick your color on the Amazon listing for the Uncrustable Sandwich Maker.


Letters
No letters yet — be the first to write.